Crochet Mesh Sweater Free Pattern
Crochet Mesh Sweater Free Pattern
Hi everyone, today I am bringing to you this crochet mesh sweater (free pattern). This crochet project is both elegant and perfect for the Spring and Summer. Crocheted with Bernat Softee Baby yarn, this sweater comes in sizes S to XXXL.
The video tutorial for this project can be found here:
Crochet Mesh Sweater Free Pattern: A Trendy Project
This crochet mesh sweater is very fashionable, perfect for this coming Spring and Summer. Crocheted sweaters are one of my favorite projects to crochet. Last year, I released the Petite Fleur Coquette inspired sweater. This is a very elegant and delicate sweater perfect for all seasons (it can be crocheted with a cotton yarn too).
The Solange Cropped Sweater is a great project for the Spring and Summer. It is made with Caron Baby Cake yarn and it is both feminine and elegant! I love it so much still.

The Mint Heart Sweater is perfect for beginner and expert crocheters alike. It comes in many different sizes and features a wonderful filet crochet heart motif! I love this sweater so much, and I think you will too!
Crochet is perfect for sweaters. Indeed, the different designs available in crochet are perfect for sweaters and tops. Let me know if you enjoy crocheting sweaters as much as I do!
Crochet Mesh Sweater Free Pattern: The Yarn
For this project, I used Bernat Softee Baby yarn. As you may know, this is one of my favorite yarns to date. Bernat Softee Baby is a very soft 100% acrylic yarn that is perfect for many different crochet designs.

The Angel Wings Cardigan is crocheted with Bernat Softee Baby. It is both elegant and delicate, as this yarn is fine and perfect for this cardigan. The Edwardian Rose Wrap is beautiful and delicate, also featuring a filet crochet design. This yarn is perfect for many different projects, including this easy baby blanket design. The Lily Hexagon Cardigan can also be crocheted with this yarn.
This new sweater design is perfect for the Spring and Summer seasons. It features a mesh stitch design and it looks very elegant and feminine. The simple filet crochet stitch is not only trendy but feminine too. This design comes in sizes S to XXXL (see pattern below).
Let me know if you enjoy crocheted sweaters as much as I!

Connecting with you
I would like to take a moment to thank every single one of you, for supporting me and my crochet journey. Indeed, I absolutely am so touched by all your messages, comments, and every person who has become a patron of my work through Patreon. Thank you!
I love connecting with my Crochet Community through my blog and Social Media. You can find me on Youtube, Instagram, and Pinterest. I would love to connect with you on these platforms.
You can also join my private Facebook group to connect.
Subscribe to our weekly newsletter so that you never miss a stitch!
Crochet Mesh Sweater: The Pattern
You can purchase the ad free, large print, PDF pattern from my Etsy store here: Crochet The Summer Mesh Sweater PDF Pattern
You can purchase the ad free, large print, PDF pattern from my Ravelry store here: Crochet The Summer Mesh Sweater PDF Pattern
Level: Easy +
Notes: I will be writing in US terms (British terms in brackets)
The video tutorial can be found here:
Gauge
4” (10 cm) = 16 stitches
4” (10 cm) = 7 rows
Sizes of finished jumper
These are the sizes measured once jumper has been assembled and all edgings and borders have been added.
Size of sleeves given once they have been sewed onto project and edging added.
Sizes are given as follows: length (from shoulder to bottom of sweater) x width (side to side).
Size S:
Body of jumper: 21” (53 cm) in length x 20” (51 cm) in width
Sleeves: 8” (20 cm) in width x 20” (51 cm) in length
Size M:
Body of jumper: 23” (58,5 cm) in length x 21,5” (54 cm) in width
Sleeves: 9,5” (23 cm) in width x 20” (51 cm) in length
Size L:
Body of jumper: 25” (63,5 cm) in length x 23” (58 cm) in width
Sleeves: 11” (28 cm) in width x 20” (51 cm) in length
Size XL:
Body of jumper: 27” (68 cm) in length x 24,5” (63 cm) in width
Sleeves: 12,5” (31 cm) in width x 20” (51 cm) in length
Size XXL:
Body of jumper: 29” (73 cm) in length x 26” (66 cm) in width
Sleeves: 14” (35,5 cm) in width x 20” (51 cm) in length
Size XXXL:
Body of jumper: 31” (79 cm) in length x 27,5” (69 cm) in width
Sleeves: 15,5” (39 cm) in width x 20” (51 cm) in length
Materials
2 (S/M), 3 (L/XL), 4 (XXL/XXXL) skeins of Bernat Softee Baby yarn in shade Pink
A 4,5 mm crochet hook
A tapestry needle
A pair of scissors
Abbreviations
ch: chain
St: stitch
sk: skip
Sp: space
Sl st: Slip stitch
Ch sp: Chain space
SC: Single Crochet (= UK Double Crochet)
DC: Double Crochet (=UK Treble Crochet)
HDC: Half Double Crochet (=UK Half Treble Crochet)
EOR: End of row/end of round

Sizes will be indicated like this
S, (M), [L], {XL}, *XXL*, XXXL
General notes concerning this pattern
Each step of this project is explained in detail throughout the pattern; this is just to give you a brief explanation of what is to be expected before starting the project.
To begin, we will be making both the front and back panels of this jumper (these two are identical).
Then we will be crocheting the sleeves (2 identical sleeves). Once this is done, we will seam each sleeve, place all the elements of the sweater together and sew this sweater together.
Once this is completed, we will be adding the sleeve edgings, the neck edging as well as crocheting the bottom edging also.
Front and Back of Jumper (2 identical panels)
Ch 96 (104) [112] {120} *128* 136
1: DC into 5th ch from hook, *sk 1 ch, ch 1, DC into next ch * until eor (first 4 ch=1 DC + ch sp)
2: Ch 4 (=DC + 1 ch), turn your work, * sk 1 st, ch 1, DC into next st until eor.
3-30 (33) [36] {39} *42* 45: Repeat row 2.
Do not fasten off.
Create neck and shoulder shape:
First side, using yarn still attached to project, just continue crocheting following the pattern explained below depending on the size you are making (see below):
Size S:
31: Ch 4 (=DC + 1 ch), turn your work, * sk 1 st, ch 1, DC into next st for the next 25 stitches (=27 stitches total).
32-33: Repeat row 31.
Fasten off, leaving long tail for sewing project together later on.
Repeat these 3 rows on the other side of this panel as follows:
Attach yarn to the 1st stitch on the other side of the front or back panel. Crochet these rows as follows:
Row 31: Ch 4 (=DC + 1 ch), turn your work, * sk 1 st, ch 1, DC into next st for the next 25 stitches (=27 stitches total).
Rows 32-33: Repeat row 31.
Fasten off, leaving long tail for sewing project together later on
Size M:
Row 34: Ch 4 (=DC + 1 ch), turn your work, * sk 1 st, ch 1, DC into next st for the next 29 stitches (=31 stitches total).
Rows 35-36: Repeat row 34.
Fasten off, leaving long tail for sewing project together later on.
Repeat these 3 rows on the other side of this panel as follows:
Attach yarn to the 1st stitch on the other side of the front or back panel. Crochet these rows as follows:
Row 34: Ch 4 (=DC + 1 ch), turn your work, * sk 1 st, ch 1, DC into next st for the next 29 stitches (=31 stitches total).
Rows 35-36: Repeat row 34.
Fasten off, leaving long tail for sewing project together later on.
Size L:
Row 38: Ch 4 (=DC + 1 ch), turn your work, * sk 1 st, ch 1, DC into next st for the next 33 stitches (=35 stitches total).
Rows 39-40: Repeat row 38.
Fasten off, leaving long tail for sewing project together later on.
Repeat these 3 rows on the other side of this panel as follows:
Attach yarn to the 1st stitch on the other side of the front or back panel. Crochet these rows as follows:
Row 38: Ch 4 (=DC + 1 ch), turn your work, * sk 1 st, ch 1, DC into next st for the next 33 stitches (=35 stitches total).
Rows 39-40: Repeat row 38.
Fasten off, leaving long tail for sewing project together later on.
Size XL:
Row 43: Ch 4 (=DC + 1 ch), turn your work, * sk 1 st, ch 1, DC into next st for the next 37 stitches (=39 stitches total).
Rows 44-45: Repeat row 43.
Fasten off, leaving long tail for sewing project together later on.
Repeat these 3 rows on the other side of this panel as follows:
Attach yarn to the 1st stitch on the other side of the front or back panel. Crochet these rows as follows:
Row 43: Ch 4 (=DC + 1 ch), turn your work, * sk 1 st, ch 1, DC into next st for the next 37 stitches (=39 stitches total).
Rows 44-45: Repeat row 43.
Fasten off, leaving long tail for sewing project together later on.
Size XXL:
Row 43: Ch 4 (=DC + 1 ch), turn your work, * sk 1 st, ch 1, DC into next st for the next 41 stitches (=43 stitches total).
Rows 44-45: Repeat row 43.
Fasten off, leaving long tail for sewing project together later on.
Repeat these 3 rows on the other side of this panel as follows:
Attach yarn to the 1st stitch on the other side of the front or back panel. Crochet these rows as follows:
Row 43: Ch 4 (=DC + 1 ch), turn your work, * sk 1 st, ch 1, DC into next st for the next 41 stitches (=43 stitches total).
Rows 44-45: Repeat row 43.
Fasten off, leaving long tail for sewing project together later on.
Size XXXL:
Row 46: Ch 4 (=DC + 1 ch), turn your work, * sk 1 st, ch 1, DC into next st for the next 44 stitches (=45 stitches total).
Rows 47-48: Repeat row 46.
Fasten off, leaving long tail for sewing project together later on.
Repeat these 3 rows on the other side of this panel as follows:
Attach yarn to the 1st stitch on the other side of the front or back panel. Crochet these rows as follows:
Row 46: Ch 4 (=DC + 1 ch), turn your work, * sk 1 st, ch 1, DC into next st for the next 44 stitches (=45 stitches total).
Rows 47-48: Repeat row 46.
Fasten off, leaving long tail for sewing project together later on.
Sleeves (make 2)
Ch 83 (for all sizes).
1: DC into 5th ch from hook, *sk 1 ch, ch 1, DC into next ch * until eor (first 4 ch=1 DC + ch sp)
2: Ch 4 (=DC + 1 ch), turn your work, * sk 1 st, ch 1, DC into next st until eor.
3-30 (36) [42] {48} *54* 54: Repeat row 2.
Fasten off, leaving long tail for seaming the sleeves.
Once you have these 4 elements, you can start assembling your jumper together.
Assembling your jumper together
Start by folding sleeves in half width wise, and seaming the sleeves together, using tapestry needle and loose end.

With wrong side facing, place the back of your jumper onto a flat surface. Now place both front panels flat onto the back of the jumper. There is no gap for the neck and front part, meaning the back and front panels are completely on top of the other (see photo below).

Now sew the shoulder seams at the top of the jumper, using the mattress stitch.
Then place sleeves to each side of the jumper, and start sewing sleeves from the top of project, working all the way down to the bottom of the jumper. Make sure you place the seam of the sleeves facing down.

You can then sew the “back” side of the sleeve to the back side of the project by flipping the project around. This creates a more seamless stitching.
Do this on both sides of the jumper for each sleeve and side of project.
Fasten off, tidy up all loose ends.
Sleeve cuffs
Repeat this process on each sleeve. We will be working this part of the project in the rounds.
Attach yarn to any stitch on the edge of the 1st sleeve.
Round 1: Ch 1 (=SC), place SCs all across the edge of the sleeve, until you reach the first ch 1; sl st to 1st ch to close off round.
Please note that this is the “wrong” side of the stitches so you need to place the SCs evenly so as to not “tighten” the project.
Fasten off, tidy up all loose ends. Repeat process on the other sleeve cuff.
Neck edging
We will be working this part in the round.
Attach yarn to any stitch at the top of the neck/shoulder opening.
Round 1: Ch 1 (=SC), SC into next st until eor, making sure you place your SC evenly across the neck opening. Sl st to first ch 1 to close off round.
Fasten off, tidy up all loose ends.
Bottom edging
We will be working this part in the rounds.
Attach yarn to the bottom edging of the jumper.
1: Ch 1 (=SC), * sk 1 st, SC into the next 2 stitches* until eor; sl st to 1st chain 1 to close off round.
2: Ch 2 (=HDC), place a HDC into next st until eor; sl st to first ch 2 to close off round.
3-5: Repeat row 2.
Fasten off, tidy up all loose ends.


You May Also Like
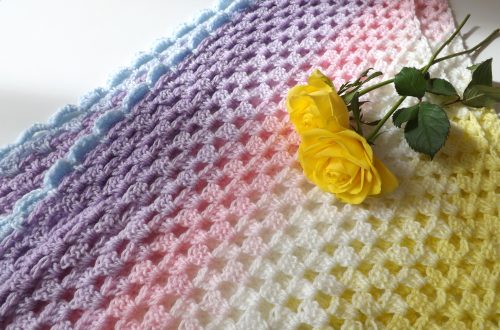
Crochet The Rainbow Shawl
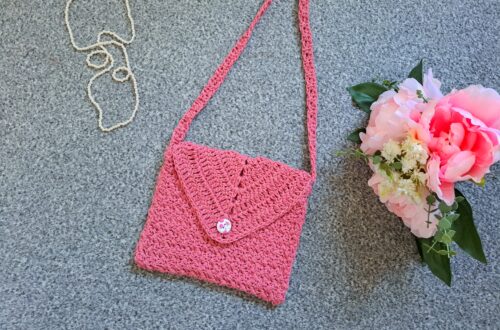
Crochet Suzette Boho Bag Free Pattern